

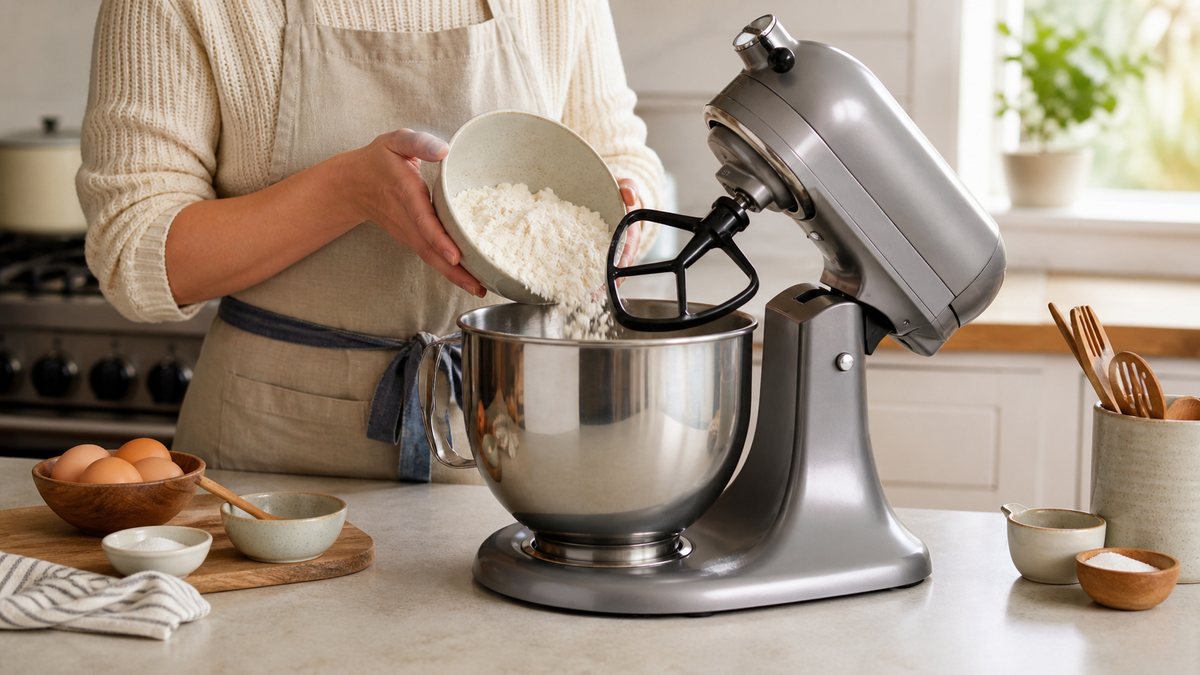
How to Add Flour to a Stand Mixer Without Making a Mess
By Emily Johnson
The cleanest way to add flour to a stand mixer is to reduce the mixer to the lowest appropriate speed, add the flour gradually near the side of the bowl, and wait for each portion to begin disappearing before adding more. A controlled pour is far less likely to create a powder cloud than dumping flour into the center of a fast-moving beater.
You do not need a complicated setup. A measured container with a pouring edge, a dry mixer bowl, and a little patience solve most flour-splatter problems. A fitted funnel or pouring shield can make the routine even easier, especially if you bake often.
Why Flour Flies Out of a Stand Mixer
Flour is light and full of tiny particles. When a moving beater hits a loose mound of it before the liquid or fat in the bowl can absorb it, air pushes those particles upward and outward. The faster the attachment moves, the wider the cloud can spread.
Three common situations make the problem worse:
- Adding a large amount at once
- Pouring directly onto the moving attachment
- Starting or returning to a medium or high speed too soon
A shallow bowl, an overfilled bowl, or the wrong attachment can also reduce control. The solution is not to force the flour into the mixture faster. It is to give the ingredients time and space to combine.
Set Up the Mixer Before Opening the Flour
A one-minute setup can save several minutes of wiping counters later.
Read the recipe and your mixer manual
Some recipes combine all dry ingredients first. Others alternate flour with milk or another liquid. Bread dough may use a different speed and attachment than cake batter. Follow the recipe sequence and the speed guidance for your exact mixer model rather than applying one method to every bake.
Use clean, completely dry equipment
Moisture on the bowl, measuring cup, shield, or funnel can make flour stick in clumps. Dry each piece before it comes near the flour. Confirm that the bowl is locked in place and that the correct beater or dough hook is attached securely.
Measure before mixing
Weigh the flour if the recipe provides grams. If the recipe uses cups, use its stated measuring method and level each cup without compacting the flour unless the instructions say otherwise. Pre-measuring keeps you from balancing a flour bag over a moving mixer.
Transfer the measured flour to a bowl, scoop, or container with a controlled pouring edge. If the recipe includes baking powder, baking soda, salt, cocoa, or spices, combine them as directed before starting the mixer.
A Step-by-Step, Low-Mess Method
1. Begin with the mixer off or at its lowest suitable speed
If the bowl contains butter, eggs, or another wet mixture, stop the mixer before the first addition when practical. Add a small portion of flour, then restart at the lowest speed your recipe and manual recommend.
Many stand-mixer instructions reserve the slowest setting for beginning a mix and adding dry ingredients. Yeast dough can have model-specific limits, so do not assume the same setting applies to every mixer or recipe.
2. Aim for the side of the bowl
Pour close to the inner wall of the bowl rather than onto the center of the moving attachment. This gives the flour a shorter drop and lets it meet the wet mixture before the beater throws it upward.
Keep hands, utensils, sleeves, and the pouring container clear of the attachment. Never reach into a running mixer.
3. Add a small portion at a time
For many batters, adding roughly one-quarter to one-third of the flour mixture per addition is manageable. The exact amount matters less than the pace: use portions small enough that loose flour does not build up on top of the batter.
4. Wait for visible flour to begin disappearing
Let the mixer draw in most of one addition before adding the next. You do not need to mix until perfectly smooth after every portion. The goal is simply to prevent a dry layer from accumulating.
5. Alternate with liquid only when the recipe says to
Cake recipes often call for alternating dry ingredients with milk or another liquid. Follow the stated order. Adding all the liquid early may change the batter, while adding all the flour at once can make it harder to combine evenly.
6. Stop the mixer before scraping
Turn the mixer off and wait for the attachment to stop completely. Then scrape the sides and bottom with an appropriate spatula. Check for a dry pocket near the bottom of the bowl before restarting.
If you want to make this step easier, see WAFORA's guide to cleaning a stand mixer safely, which covers the bowl, attachments, hub, and exterior.
7. Finish only as long as the recipe requires
Once the last flour streaks disappear, move to the next recipe step. Many cake, muffin, and cookie batters become less tender when they are mixed longer than necessary. Bread dough is different and should be kneaded according to its recipe and mixer guidance.
Tools That Can Improve Pouring Control
A careful technique works with an ordinary measuring container, but frequent bakers may prefer a fitted accessory.
The WAFORA™ PourGuide Funnel is designed to guide flour, sugar, cocoa, and other dry ingredients into a stand-mixer bowl. It gives the ingredient a defined path instead of requiring you to hold a wide bowl over the mixer. Check the product details and your mixer's dimensions before use because bowl shapes and clearances vary.
The WAFORA™ SplashGuard covers more of the bowl and includes a wide, angled opening for additions. Its current product information describes it for tilt-head stand-mixer bowls. Confirm compatibility with your exact bowl and model before ordering or operating the mixer.
These accessories address slightly different needs. A funnel focuses the stream of dry ingredients. A shield covers more of the bowl opening and helps contain loose powder. Neither replaces the need to use an appropriate speed and keep hands away from the moving attachment.
You can compare these and other baking accessories in WAFORA's Mixer Essentials collection.
Recipe-Specific Adjustments
Cakes, muffins, and quick breads
Use the lowest suitable speed while adding flour, then stop when the batter reaches the texture described in the recipe. If a recipe warns against overmixing, finish the final streaks by hand with the mixer off.
Cookies
Cookie dough can become stiff as the flour goes in. Use the attachment named in the recipe and avoid increasing speed just because the dough looks heavy. Stop and scrape only after the mixer has fully stopped.
Yeast dough
Bread recipes may begin with flour already in the bowl or may add remaining flour gradually. Follow the recipe and the speed limit in your model's manual. Some mixers specify a maximum kneading speed to protect the machine.
Cocoa and powdered sugar
These fine powders can be even more airborne than flour. Break up visible clumps before adding them, work in small portions, and keep the mixer low until the powder is absorbed.
Common Mistakes That Create a Flour Cloud
- Dumping from the bag: A large bag is difficult to control and can touch the attachment. Measure into a smaller container first.
- Pouring onto the beater: Aim beside the attachment, close to the bowl wall.
- Raising the speed too soon: Wait until loose flour is no longer sitting on the surface.
- Overfilling the bowl: Leave enough working space for the mixture to move without climbing over the rim.
- Using a loose accessory: Stop and reposition any shield or funnel that shifts. Do not hold it in place beside a moving attachment.
- Scraping while the mixer runs: Switch off and wait for all motion to stop.
A Faster Cleanup Routine
Wipe dry flour first with a dry microfiber cloth or soft brush. Adding water immediately can turn flour dust into paste. Once the loose powder is removed, clean the counter and mixer exterior according to the surface and appliance instructions.
Wash the bowl, attachment, and any pouring accessory according to their individual care directions. Dishwasher guidance is not universal across mixer parts, so check the manual rather than assuming every piece can go in the dishwasher.
Frequently Asked Questions
What speed should I use when adding flour to a stand mixer?
Use the lowest speed that your recipe and mixer manual recommend for adding dry ingredients. Some recipes ask you to stop the mixer for additions. Yeast dough may have different instructions, so check the guidance for your model.
Should I add flour while the mixer is running?
You can add flour at a very low speed when the recipe and machine instructions allow it. For more control, stop the mixer, add a small portion, and restart slowly. Never place a hand or utensil inside a moving mixer.
Why does flour collect at the bottom of my mixer bowl?
The attachment may not be reaching the mixture evenly, or flour may have been added faster than the batter could absorb it. Stop the mixer, scrape the bottom safely, and check the attachment setup described in your manual.
Can I add all the flour at once?
Only when the recipe specifically calls for it. In many batters, gradual additions reduce mess and help the ingredients combine more evenly.
Is a pouring shield or funnel necessary?
No. A small container, low speed, and gradual additions can work well. A fitted funnel or shield is useful when you bake frequently, work with especially fine powders, or want a more controlled pouring path.
Make the Next Batch Easier
Mess-free baking starts with a simple rhythm: measure, slow down, pour near the bowl wall, and wait before the next addition. If you want a more guided path for dry ingredients, explore the PourGuide Funnel, the SplashGuard, and more practical tools from WAFORA.